


The Fear of Migration Downtime: Why Precision Engineering Matters
In short: This website migration checklist moves a site with zero downtime: back up everything, copy files and databases to the new host, test with your hosts file, lower DNS TTL, switch DNS, and keep the old hosting until propagation finishes.
Migrating a production website to a new hosting provider is often viewed by business owners with dread. The fear of lost sales, broken payment gateways, missing customer emails, and damaged search engine rankings causes many companies to remain trapped on slow, overpriced, or unreliable hosting. However, downtime during a website migration is not an inevitable reality; it is simply the byproduct of an undisciplined, rushed migration procedure. By understanding how the Domain Name System (DNS) resolves addresses and staging your application assets before cutting over public routing, you can achieve a flawless 100% zero-downtime transition.
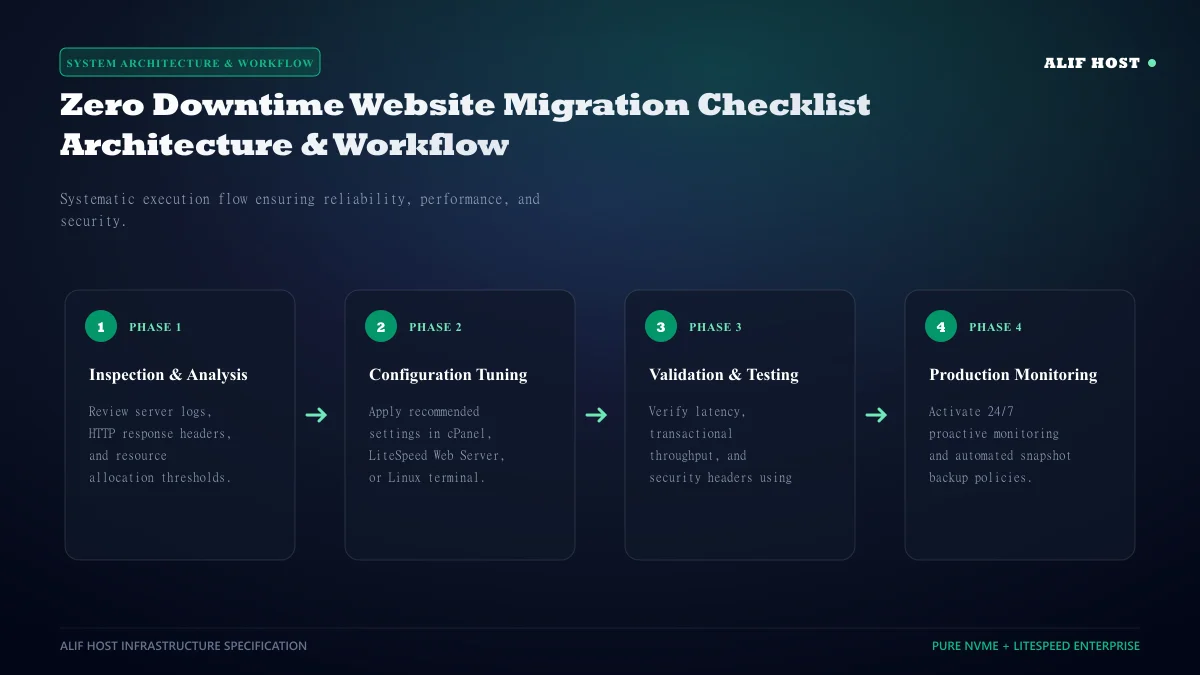
- Parallel Operating Environments: The old and new hosting accounts operate simultaneously during migration, ensuring no service gap occurs.
- Database Consistency: Preventing desynchronized database writes during the cutover window eliminates lost customer transactions.
- Email Continuity: Pre-configuring mailboxes and migrating historical IMAP message folders guarantees zero lost corporate emails.
Phase 1: Pre-Migration Planning (48 Hours Before Migration)
Successful migrations are won in the preparation phase. Complete these two critical actions at least two days prior to data transfer:
1. Lower DNS Time-To-Live (TTL) to 300 Seconds
Access your authoritative DNS zone editor and reduce the TTL on your primary A records and MX records from standard 86400 (24 hours) down to 300 (5 minutes). This ensures that when you update your server IP address later, internet resolvers worldwide will recognize the change in five minutes instead of 24 hours.
2. Audit Storage Footprint and Clean Obsolete Bloat
Delete expired transients, trash folders, and obsolete staging copies to minimize file transfer payloads and speed up migration times.
Phase 2: Data Transfer and Database Synchronization
Transfer your digital assets securely between hosting environments:
- cPanel to cPanel Automated Transfer: If both hosts use cPanel, generate a full backup archive (
cpmove-username.tar.gz) containing emails, cron jobs, databases, and SSL certificates, restoring it cleanly on the destination server. - Manual File Transfer via SFTP/rsync: Compress
public_htmlinto a single zip or tar.gz archive to preserve Unix file permissions. - MySQL Database Export: Dump your database using phpMyAdmin or
mysqldumpwith--single-transactionto ensure transactional consistency.
Zero-Downtime Migration Execution Timeline
Review this sequential operational timeline to coordinate your migration activities.
| Timeline | Operational Action | Verification Milestone |
|---|---|---|
| 48 Hours Before Cutover | Lower DNS TTL to 300 seconds | Verify propagation via dig or nslookup |
| 24 Hours Before Cutover | Provision destination hosting & configure email accounts | Confirm mailbox credentials match exactly |
| 2 Hours Before Cutover | Transfer files & import database to destination server | Confirm file permissions set to 755/644 |
| T, 1 Hour | Test destination site using local hosts file override | Verify database logins, cart flows, and SSL |
| Zero Hour (Cutover) | Update DNS A Record to new server IP address | Monitor live server access logs for incoming traffic |
| T + 48 Hours | Restore standard DNS TTL (86400) and decommission old host | Complete final audit of new hosting performance |
Phase 3: Pre-Launch Testing Using Local Hosts File Override
Never switch public DNS records blindly! Test the new hosting environment before anyone else in the world sees it by modifying your computer’s local hosts file:
- Windows: Open Notepad as Administrator and edit
C:\Windows\System32\drivers\etc\hosts. - macOS / Linux: Edit
/etc/hostsin terminal usingsudo nano /etc/hosts. - Add Mapping: Add
NEW_SERVER_IP yourdomain.com www.yourdomain.com. - Open Browser: Load your website. Your computer will bypass public DNS and connect directly to the destination server, allowing you to test shopping carts, forms, and admin logins with 100% confidence.
- Clean Up: Delete the test line from your
hostsfile after verification.
Phase 4: DNS Cutover and Final Verification
Once testing passes, update your domain’s A record in your DNS zone to your new server IP address. Because TTL was lowered to 300 seconds, global traffic transitions smoothly within minutes. Leave your old hosting account active for 48 hours to serve any lingering ISP caches before canceling.
Handling Dynamic E-Commerce Transactions During Migration Window
For busy e-commerce stores processing orders every few minutes, database desynchronization during DNS propagation is a major hazard. If Customer A places an order on the old server while Customer B places an order on the new server, database merging becomes an operational nightmare.
- Put Old Site in Maintenance Mode at Cutover: At the moment of DNS A record cutover, place the OLD server in read-only maintenance mode displaying an informative notice.
- Execute Final Differential Database Sync: Run an expedited
mysqldumpand import the final delta of orders into the new server. - Remote Database Proxying: Alternatively, configure the old server’s
wp-config.phpto connect remotely to the NEW server’s MySQL database over secure TLS, ensuring all orders write directly to the single new database.
Post-Migration DNS Propagation and Cache Verification Protocol
After updating DNS A records, continuously monitor global DNS propagation using dig or online tools across multiple continents. Verify that SSL certificates auto-renew cleanly on the new server via cPanel AutoSSL or Certbot, and check mail deliverability to confirm SPF and DKIM records remained intact throughout the migration.
Post-Cutover DNS and SSL Verification Protocol
Complete these critical verification steps within the first 48 hours following your live DNS cutover:
- Monitor Real-Time Server Access Logs: Verify that incoming HTTP GET and POST requests are hitting the destination server IP.
- Verify SSL Certificate Auto-Renewal: Confirm that Let's Encrypt AutoSSL certificates are active and valid for all subdomains.
- Send and Receive Test Emails: Verify that corporate mailboxes send and receive messages without bounce-backs or SPF failures.
- Restore DNS TTL to Normal: Once propagation is complete, restore DNS TTL to standard 86400 (24 hours) for optimal caching.